Embracing a sustainable lifestyle doesn’t mean sacrificing style or function at home.
One of the best ways to achieve both is by installing solar lights.
Ready to add a touch of eco-friendly charm to your outdoor space?
Awesome!
In this post, I’ll show you exactly how to attach solar lights to brick walls, so your space can shine efficiently and look fantastic.
From selecting the right tools to drilling into brick with ease, I’ll cover everything you need for the perfect glow.
Key Takeaways
- To attach solar lights to a brick wall, choose a sunny location and use masonry screws to secure the mounting brackets.
- Start by marking where the lights will go, then drill into the brick with a masonry bit, and insert wall plugs for a secure hold.
- Attach the mounting bracket to the wall plugs, ensuring the lights are straight and stable before adding the lights.
- Adjust the solar panels to capture maximum sunlight, and test the lights to confirm optimal positioning and function.
- For non-drilling options, heavy-duty adhesive hooks or outdoor mounting tape work well for lighter solar lights.
What Steps Should You Follow to Attach Solar Lights to Brick Walls?
1. Select the Ideal Location for Installation

Before we start installing solar lights on your brick walls, it’s important to choose the right location for mounting them.
You don’t want to just place them anywhere; they should function well and enhance the aesthetics of your space.
First, gather all the necessary tools, including masonry drill bits suitable for brick, a reliable power drill, sturdy masonry screws, a screwdriver, and of course, your solar lights.
Once your tools are ready, the next step is to find the best spots for sunlight exposure.
Look around for areas that may be too shaded, such as beneath large trees or beside tall buildings.
Finally, think about the purpose of the lights and how they will fit into your outdoor design.
Are they meant to illuminate a pathway, improve safety in the garden at night, or simply create a pleasant ambiance?
Position them for optimal effectiveness while also considering how they will blend in with your yard or garden’s overall appearance.
2. Measure and Mark Drilling Spots

After you’ve picked the perfect spot for your solar lights, the next step is to position them just right on your brick wall.
First, place each solar light against the wall where you plan to install it.
Then, hold each light in position and try to picture how it will light up the area once it’s dark.
Now, it’s time to grab your tape measure and make sure everything is spaced out evenly.
This is important if you’re putting up several lights.
After that, measure the distance between the lights and check their height off the ground to make sure they’re all even.
Once you’re happy with how everything is laid out, mark exactly where the screws need to go with a pencil or a piece of chalk.
These marks are where you’ll drill, so you want them to be spot-on to keep your lights straight and secure.
3. Drill Holes with a Masonry Bit

Now that your spots are marked, it’s time to drill into the brick.
First, ensure your drill is equipped with a masonry bit.
These bits are designed to handle tough materials like brick without causing any damage.
Confirm that the size of the masonry bit corresponds to the masonry screws you’ll be using, as this is essential for securely holding your lights in place.
Next, align your drill with the marks you’ve made on the brick.
Keep it level and steady to ensure your holes are straight.
Begin drilling slowly to prevent the bit from slipping off the marks.
Once the bit has a firm grip on the brick, you can increase your drilling speed, but remember to let the drill do the work—there’s no need to force it.
Drill the holes deep enough to accommodate the entire length of the masonry screws.
After drilling, clear away any remaining brick dust to prepare for the next step of inserting the wall plugs.
4. Insert Wall Plugs and Mount the Light

Once you’ve selected the ideal spot for your solar lights, the next step is to position them correctly on your brick wall.
Start by holding each solar light against the wall in your desired location.
Visualize how the light will illuminate the area once it gets dark.
Next, take your tape measure to ensure everything is evenly spaced, which is especially crucial if you’re installing multiple lights.
Measure the distance between each light and check its height from the ground to ensure uniformity.
Once you’re satisfied with the layout, use a pencil or chalk to mark the exact spots where the screws will go.
These marks are essential for drilling, so make sure they are precise to keep your lights straight and securely mounted.
5. Attach the Solar Light

For all the DIY enthusiasts out there, we’re now at the most exciting part—attaching the solar light to its bracket.
Here’s how to do it: hold the solar light up to the bracket you’ve already secured to the wall.
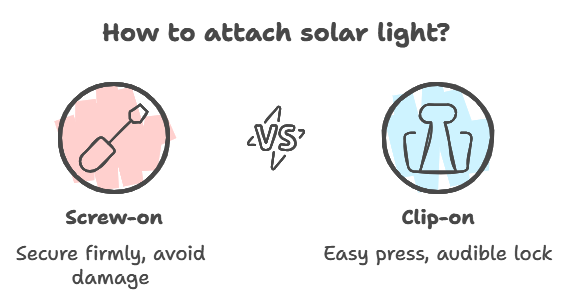
If your light attaches with screws, align the holes on the light with those on the bracket.
Use your screwdriver to gently tighten the screws, ensuring they are secure but not so tight that they risk cracking the light or stripping the bracket.
If your light uses a clip-on mechanism, simply press it against the bracket until you hear a reassuring click.
That sound indicates it’s securely in place.
6. Adjust the Solar Panels

You need to adjust your solar lights much like you would any other favorite fixture in your home to ensure they shine at their brightest.
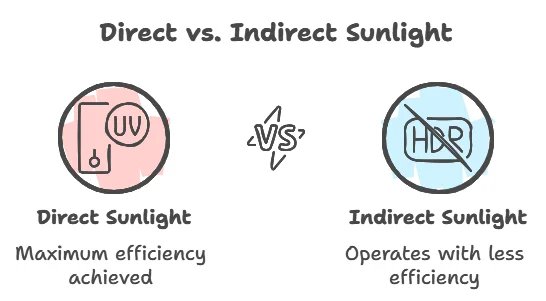
The key is the angle of the solar panels—get this right, and they’ll capture the most sunlight throughout the day, resulting in a brighter glow at night.
Begin by positioning each solar panel to face the area where the sun hits the hardest.
Keep in mind that the sun’s path changes with the seasons, so be prepared to adjust the angles periodically.
Once the panels are correctly aimed, it’s time for a quick test.
Turn on the lights to check how well they illuminate the areas you want to brighten.
If you notice any dark corners that need more light, now is the perfect opportunity to rearrange or tweak the angles until the lighting is just right.
FAQs
How to Attach Solar Lights to Bricks?
To attach solar lights to bricks, use adhesive hooks, outdoor-rated double-sided tape, or masonry glue to securely attach solar lights to brick surfaces without drilling.
How to Attach Solar Lights to a Brick Wall Without Drilling?
To attach solar lights to a brick wall without drilling, opt for heavy-duty adhesive strips or clips designed for outdoor use; to ensure they can withstand weight and weather conditions.
How to Stick Solar Lights to a Brick Wall?
To stick solar lights to a brick wall, strong outdoor adhesive strips or removable brick clips work well for attaching lights to textured brick walls without permanent alterations.
Can You Put Solar Panels on a Brick Wall?
You can put solar panels on a brick wall using mounting brackets, though optimal sunlight exposure and panel angle should be considered.
Conclusion
As promised, we’ve guided you through every step of attaching solar lights to brick walls.
Now, here’s some insider advice to perfect your installation: try adjusting the angle of each solar panel slightly.
This small adjustment allows them to capture sunlight more efficiently throughout the day, ensuring they charge quicker and illuminate your yard more effectively.
If you have any questions or need additional installation tips, don’t hesitate to reach out or leave a comment below.


